STM32CubeMX Download, Features, Setup, and Alternatives
If you’ve ever opened a fresh STM32 project and stared blankly at a wall of register definitions, you already know why STM32CubeMX exists. Configuring clock trees and pin mappings by hand is slow, error-prone, and honestly not a great use of anyone’s time.
STM32CubeMX is STMicroelectronics’ free graphical configuration tool that lets you set up STM32 microcontrollers visually and generate ready-to-use initialization code in seconds. Instead of writing register-level setup code from scratch, you click, configure, and generate.
This guide walks through everything you need — what STM32CubeMX does, how to install it, how to configure pins and clocks, how it fits with STM32CubeIDE and STM32CubeProgrammer, and what to do when something goes wrong.
What Is STM32CubeMX and What Does It Do?
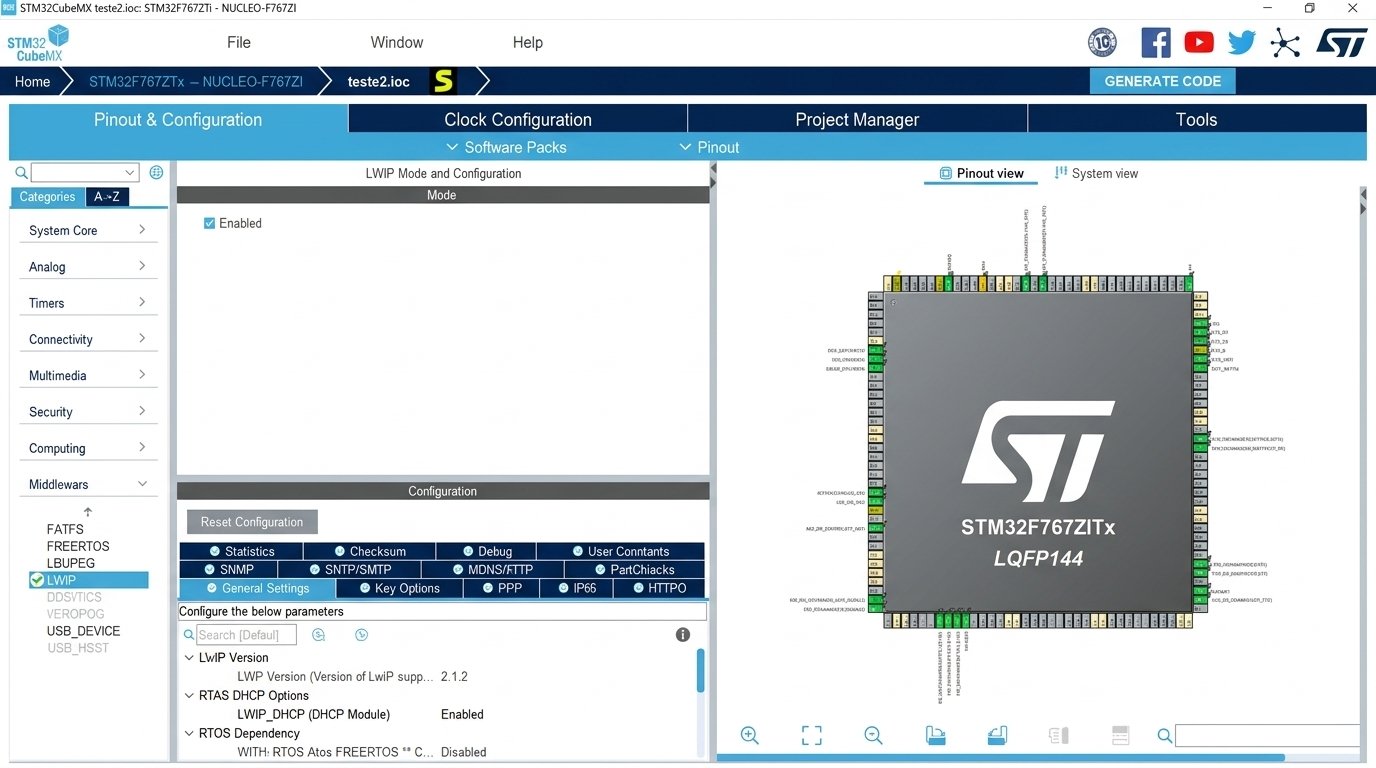
STM32CubeMX Configuration Tool for STM32 Microcontrollers
STM32CubeMX is a graphical tool built by STMicroelectronics that simplifies configuring STM32 microcontrollers and microprocessors, then generates the matching initialization C code (or a partial Linux Device Tree for Cortex-A based STM32MP devices), all through a guided, step-by-step interface.
STM32CubeMX Project Generator and Development Tool
Rather than being an IDE itself, CubeMX is a project generator. You pick a chip or a development board, configure it visually, and the tool spits out a complete, buildable project — pin setup, clock configuration, HAL drivers, and middleware stacks included — ready to be opened in your compiler or IDE of choice.
STM32 MCU, Peripheral, Pin, and Clock Configuration
At its core, three things happen in every CubeMX session:
- You select an MCU or board
- You configure pins, peripherals, and clocks
- You generate a project with initialization code
How STM32CubeMX Fits Into STM32 Development
CubeMX sits at the very start of the STM32 workflow. It’s part of the broader STM32Cube ecosystem, which also includes STM32CubeIDE (for writing and debugging code) and STM32CubeProgrammer (for flashing firmware onto real hardware). Think of CubeMX as the tool that gets your project ready, not the tool that builds or flashes it.
Is STM32CubeMX Free?
Yes. STM32CubeMX is completely free to download and use, with no license fees, for both personal and commercial embedded projects.
STM32CubeMX Features
STM32 Microcontroller Configuration
CubeMX covers the entire STM32 portfolio, letting you pick a part by family, package, peripheral count, or by simply choosing a development board instead of hunting for a specific chip.
STM32 Pinout and Pin Assignment
The pinout view shows a visual chip diagram. Click a pin, assign it a function, and CubeMX automatically checks for conflicts.
GPIO Configuration and Setup
Beyond just assigning functions, you can set GPIO mode (input, output, alternate function), pull-up/pull-down resistors, output speed, and initial logic level — all from dropdown menus.
Clock Tree and System Clock Configuration
The Clock Configuration tab shows a full visual diagram of your MCU’s clock tree, from oscillators through PLLs to peripheral buses.
Peripheral Configuration and Initialization
Each peripheral (UART, SPI, ADC, timers, and so on) gets its own configuration panel with mode selection and parameter fields, with STM32CubeMX validating settings and flagging incompatible configurations before you generate code.
STM32CubeMX Code Generation
Once configuration is done, one click generates a complete project: initialization code, HAL drivers, and IDE-specific project files.
STM32 HAL and Initialization Code
Generated code is built around STMicroelectronics’ HAL (Hardware Abstraction Layer), which gives you readable, portable functions instead of raw register writes.
STM32 Project Generation and Configuration
STM32CubeMX generated projects bundle the initialization C code, HAL drivers, required middleware, and all files needed to open the project directly in a supported IDE.
STM32CubeMX Pinout and GPIO Configuration
STM32CubeMX Pinout Configuration
The pinout editor is where most projects begin. It renders the physical chip package so you can assign functions pin-by-pin, or let CubeMX auto-assign based on selected peripherals.
STM32 GPIO Input and Output
Every unused pin can be set as a general-purpose input or output, with configurable pull resistors and speed settings, directly from the pin’s context menu.
GPIO Interrupt Configuration
Pins can be configured as external interrupt (EXTI) lines, triggering on rising edge, falling edge, or both — useful for buttons, sensors, and wake-up events.
STM32 Pin Mapping and Assignment
Because many STM32 pins support multiple functions, CubeMX manages the mapping automatically and warns you the moment two peripherals compete for the same physical pin.
Alternate Function Configuration
Peripherals like SPI, I2C, and timers require specific alternate function (AF) mappings. CubeMX handles this in the background so you don’t need to memorize AF tables from the datasheet.
STM32CubeMX GPIO Setup
Direct answer: to configure GPIO in STM32CubeMX, open the Pinout view, click a pin, choose GPIO_Output or GPIO_Input, then fine-tune pull resistors and speed in the GPIO configuration panel before generating code.
STM32CubeMX Clock Configuration and Clock Tree
STM32CubeMX Clock Tree
The Clock Configuration tab is arguably the most valuable part of CubeMX. It visually maps every clock source, multiplier, and divider, so you can see the resulting frequency at each peripheral bus in real time.
STM32 System Clock Configuration
You choose your system clock source — internal oscillator, external crystal, or PLL output — and CubeMX recalculates every downstream frequency instantly.
HSI and HSE Clock Configuration
STM32 MCUs typically offer an internal high-speed oscillator (HSI) and support for an external crystal (HSE). HSI needs no external hardware; HSE offers better accuracy for timing-critical applications.
PLL Configuration
The PLL (Phase-Locked Loop) lets you multiply a lower input frequency up to your target system clock speed. CubeMX shows valid multiplier/divider combinations and flags anything out of spec for your chosen MCU.
STM32 Clock Sources and Frequency Settings
Every bus — AHB, APB1, APB2 — has its own maximum frequency limit depending on the MCU family, and CubeMX enforces these limits automatically as you adjust settings.
Watch for red warnings: if the Clock Configuration tab highlights a value in red, your requested frequency isn’t achievable with the current PLL settings — adjust the multiplier/divider until the warning clears before generating code.
STM32CubeMX Clock Setup
Direct answer: open the Clock Configuration tab, set your desired system clock frequency in the box next to “HCLK,” and CubeMX will auto-calculate the required PLL settings, or flag the configuration in red if it’s not achievable.
STM32CubeMX Code Generation
Generate C Code With STM32CubeMX
Once every pin, peripheral, and clock setting looks right, click Generate Code. CubeMX builds the full project structure in seconds.
STM32CubeMX Generated Code and Project Files
A generated project typically includes main.c, peripheral-specific init files, a Drivers folder with HAL sources, and IDE project files (for STM32CubeIDE, Keil, or IAR, depending on your selection).
STM32 HAL Code Generation
All initialization functions are written using HAL calls, meaning the generated code is portable across similar STM32 families with minimal changes.
STM32 Initialization Code
The generated main.c includes clearly separated initialization functions for each peripheral (MX_GPIO_Init(), MX_USART1_UART_Init(), and so on), plus clearly marked USER CODE sections where your application logic goes.
STM32CubeMX C Code Generation Settings
Under Project Manager, the Code Generator tab lets you choose whether to generate separate .c/.h files per peripheral, keep user code sections protected, and set the toolchain/IDE target.
Regenerate and Customize STM32CubeMX Code
One of CubeMX’s most practical features: if you change a pin or add a peripheral later, regenerating code preserves anything written inside the USER CODE BEGIN / END markers, so you don’t lose your application logic.
STM32CubeMX HAL and Peripheral Configuration
STM32 HAL Configuration
The HAL configuration file (stm32XXxx_hal_conf.h) controls which HAL modules are compiled into your project, and CubeMX generates this automatically based on which peripherals you’ve enabled.
STM32 Peripheral Initialization
Each enabled peripheral gets a matching initialization function, called automatically from main() before your application code runs.
Configure STM32 Peripherals With CubeMX
Direct answer: select a peripheral from the left-hand panel, choose its operating mode from the dropdown, set parameters in the configuration tab, then generate code — CubeMX handles clock enabling and pin mapping automatically.
Peripheral Settings and Initialization Code
Every peripheral’s parameter tab mirrors real hardware settings — baud rate for UART, clock polarity for SPI, resolution for ADC — so what you configure visually maps directly to generated register values.
STM32CubeMX HAL Project Setup
New projects default to HAL drivers, though several STM32 families also support Low-Layer (LL) drivers for developers who want more performance at the cost of some abstraction.
STM32CubeMX UART, SPI, I2C, and Communication Peripherals
| Peripheral | Common Use Case | Key Configuration Fields |
|---|---|---|
| UART/USART | Serial debug, sensor comms | Baud rate, word length, parity, stop bits |
| SPI | Displays, flash memory, sensors | Mode, data size, clock polarity/phase |
| I2C | EEPROMs, low-speed sensors | Speed mode, addressing mode |
| CAN | Automotive, industrial networks | Bit timing, filter configuration |
| Ethernet | Networking, IoT gateways | PHY interface, MAC address |
| USB | Device/host connectivity | Class (CDC, HID, MSC), speed |
STM32CubeMX UART and USART Configuration
UART setup covers baud rate, data bits, parity, stop bits, and flow control — with CubeMX validating that your chosen baud rate is achievable given the current clock configuration.
STM32CubeMX SPI Configuration
SPI configuration includes master/slave mode, clock polarity and phase (the four standard SPI modes), and data frame size.
STM32CubeMX I2C Configuration
I2C settings include speed mode (standard, fast, or fast-plus depending on the MCU) and addressing mode (7-bit or 10-bit).
STM32CubeMX CAN Configuration
For CAN and CAN-FD peripherals, CubeMX lets you set bit timing parameters and configure hardware filters for message acceptance.
STM32CubeMX Ethernet Configuration
Ethernet-capable STM32 parts (like STM32F7 and STM32H7 series) expose PHY interface settings and MAC configuration through CubeMX, often paired with middleware like LwIP.
STM32CubeMX USB Configuration
USB configuration lets you select device class (CDC for virtual COM ports, HID, mass storage) and automatically pulls in the required USB middleware stack.
STM32CubeMX ADC, DMA, Timer, PWM, and Other Peripherals
STM32CubeMX ADC Configuration
ADC setup covers resolution, sampling time, channel selection, and conversion mode (single, continuous, or scan across multiple channels).
STM32CubeMX DMA Configuration
DMA (Direct Memory Access) can be linked to almost any peripheral, letting data move between memory and peripherals without CPU intervention — CubeMX shows which DMA channels are available for each peripheral you enable.
STM32CubeMX Timer Configuration
Timers can be configured for basic counting, input capture, output compare, or PWM generation, with prescaler and period fields calculating your exact timing.
STM32CubeMX PWM Configuration
For PWM specifically, you set the timer’s period and each channel’s duty cycle — commonly used for motor control, LED dimming, and servo signals.
STM32CubeMX RTC and Watchdog Configuration
The Real-Time Clock (RTC) and independent/window watchdogs (IWDG/WWDG) are configured with their own dedicated tabs for calendar settings and timeout periods.
STM32 Peripheral Setup and Configuration
Direct answer: almost every on-chip peripheral in STM32CubeMX follows the same workflow — enable it from the left panel, pick a mode, adjust parameters, and let the tool handle pin and clock assignment automatically.
STM32CubeMX and STM32CubeIDE
What Is the Difference Between STM32CubeMX and STM32CubeIDE?
STM32CubeMX is a configuration and code-generation tool. STM32CubeIDE is a full integrated development environment for writing, compiling, flashing, and debugging that code. As of STM32CubeIDE 2.0.0, released in November 2025, the two tools are fully separate — device configuration is no longer bundled inside STM32CubeIDE and is instead handled exclusively through the standalone STM32CubeMX application.
STM32CubeMX to STM32CubeIDE Project Workflow
The typical modern workflow is: configure your project in standalone STM32CubeMX, generate the code, then import that generated project into STM32CubeIDE for actual firmware development.
Generate an STM32CubeIDE Project With CubeMX
When generating code, select STM32CubeIDE as the target toolchain, and CubeMX will produce a ready-to-import Eclipse-based project.
Import and Open a CubeMX Project in CubeIDE
Inside STM32CubeIDE, use File → Import → Existing Projects into Workspace, point it at your generated project folder, and it opens exactly as configured.
STM32CubeIDE Coding, Building, and Debugging
Once imported, STM32CubeIDE handles everything CubeMX doesn’t: writing application logic, compiling, setting breakpoints, and stepping through code on real hardware.
STM32CubeMX With Visual Studio Code
STM32CubeMX and VS Code Development
Many developers prefer VS Code’s lighter footprint and extension ecosystem over a dedicated embedded IDE. CubeMX supports this by generating Makefile or CMake-based projects instead of IDE-specific ones.
Generate STM32 Projects for VS Code
When generating code, choose the Makefile or CMake toolchain option, then open the resulting folder directly in VS Code with the appropriate C/C++ and Cortex-Debug extensions installed.
STM32 Development Workflow With CubeMX and VS Code
This setup gives you CubeMX’s configuration convenience with VS Code’s editing and debugging tools, using extensions like Cortex-Debug alongside an external toolchain such as arm-none-eabi-gcc and OpenOCD.
STM32CubeMX and STM32CubeProgrammer
What Is STM32CubeProgrammer?
STM32CubeProgrammer is a separate STMicroelectronics tool used to flash compiled firmware onto physical STM32 devices, read memory, and manage option bytes — it doesn’t configure peripherals or generate code.
STM32CubeMX vs STM32CubeProgrammer
| Tool | Purpose |
|---|---|
| STM32CubeMX | Configures pins/clocks/peripherals, generates initialization code |
| STM32CubeProgrammer | Flashes compiled binaries onto STM32 hardware |
| STM32CubeIDE | Writes, compiles, and debugs the application code |
Configure Projects With CubeMX and Program STM32 Devices
The full pipeline looks like this: configure in CubeMX → write/compile in CubeIDE (or another toolchain) → flash the resulting binary with STM32CubeProgrammer.
STM32 Programming and Firmware Tools
STM32CubeProgrammer supports multiple interfaces for flashing, including ST-LINK, USB DFU, and UART bootloader mode, depending on your board and debugger.
STM32CubeProgrammer Download and Installation
STM32CubeProgrammer is downloaded separately from STMicroelectronics’ official site and installs on Windows, Linux, and macOS, matching CubeMX’s cross-platform availability.
STM32CubeMX Supported STM32 Microcontrollers and Boards
STM32 Microcontroller Families Supported by CubeMX
CubeMX supports STMicroelectronics’ full STM32 lineup, spanning entry-level to high-performance and even Cortex-A based microprocessors.
STM32F0, STM32F1, STM32F3, STM32F4, and STM32F7
These are the long-standing mainstream Cortex-M families — F0/F1 for cost-sensitive general-purpose designs, F3 for mixed-signal applications, and F4/F7 for higher-performance workloads including connectivity and DSP tasks.
STM32H7 and STM32U5 Configuration
STM32H7 targets high-performance applications with dual-core options on some variants, while STM32U5 is built around ultra-low-power operation for battery-powered designs.
STM32C0, STM32G0, STM32G4, and STM32WB Series
Rounding out the portfolio: STM32C0 for cost-optimized entry-level designs, STM32G0/G4 for general-purpose and mixed-signal use, and STM32WB for Bluetooth Low Energy-enabled applications, all of which have received ongoing CubeMX support additions.
STM32MP1 and STM32MP2 Platforms
For STM32 microprocessors like the STM32MP1 and STM32MP2 series, CubeMX handles GPIO/clock configuration and partial Linux Device Tree generation for the Cortex-A side.
STM32 Nucleo and Discovery Boards
Rather than picking a raw chip, you can select a Nucleo or Discovery development board directly, and CubeMX pre-configures pinout to match the board’s onboard peripherals and connectors.
STM32CubeMX Download and Latest Version
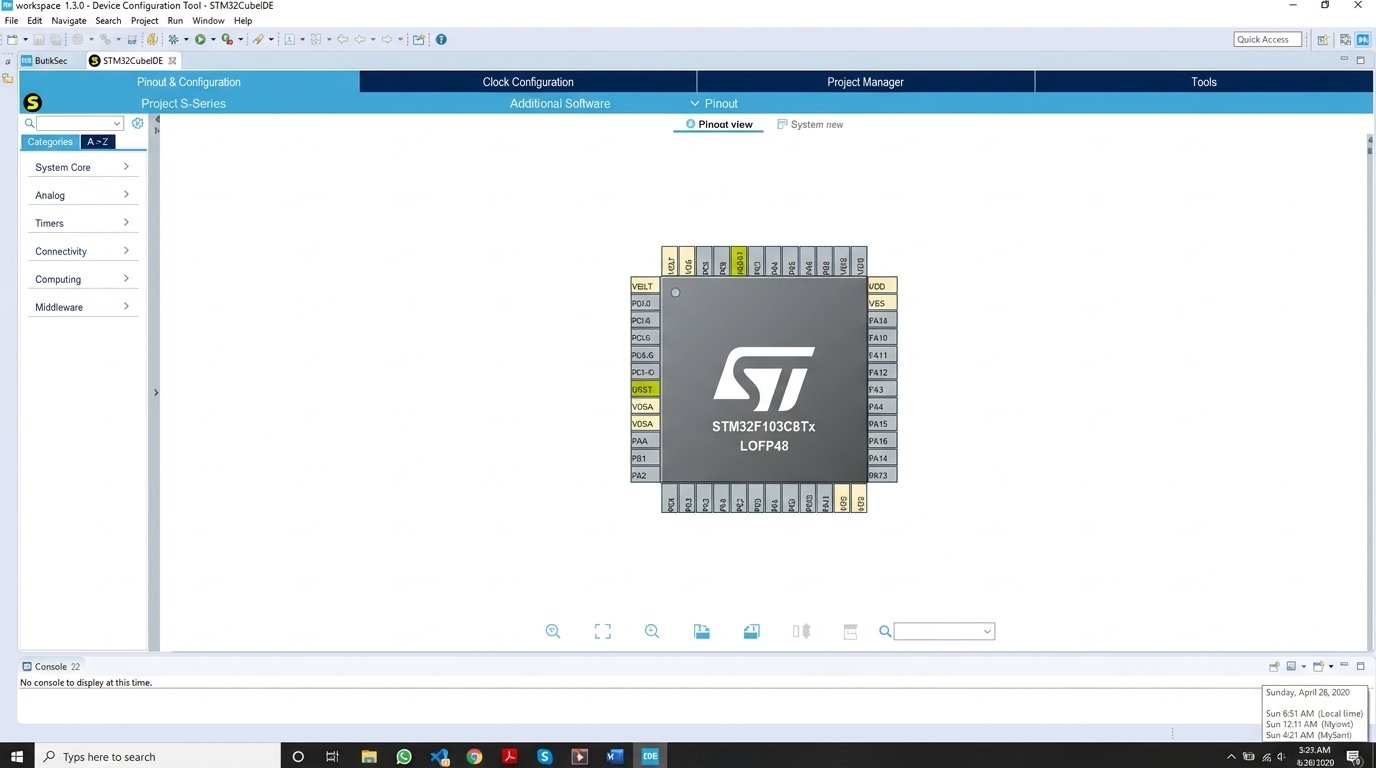
STM32CubeMX Download
STM32CubeMX is downloaded as a free all-in-one installer directly from STMicroelectronics’ official website, with dedicated installers for Windows, Linux, and macOS (including separate builds for Intel and Apple Silicon Macs).
STM32CubeMX Free Download
No account paywall or license purchase is required — you’ll typically just accept ST’s software license terms and, in many cases, create a free myST account to access the download.
STM32CubeMX Latest Version
As of late 2025, STM32CubeMX has reached version 6.18.0, reflecting continuous updates that add new MCU part numbers, board support, and workflow improvements.
STM32CubeMX Software and Installer
The installer bundles the CubeMX application itself along with the initial firmware package database needed to start configuring supported MCU families right away.
STM32CubeMX Installation and Setup
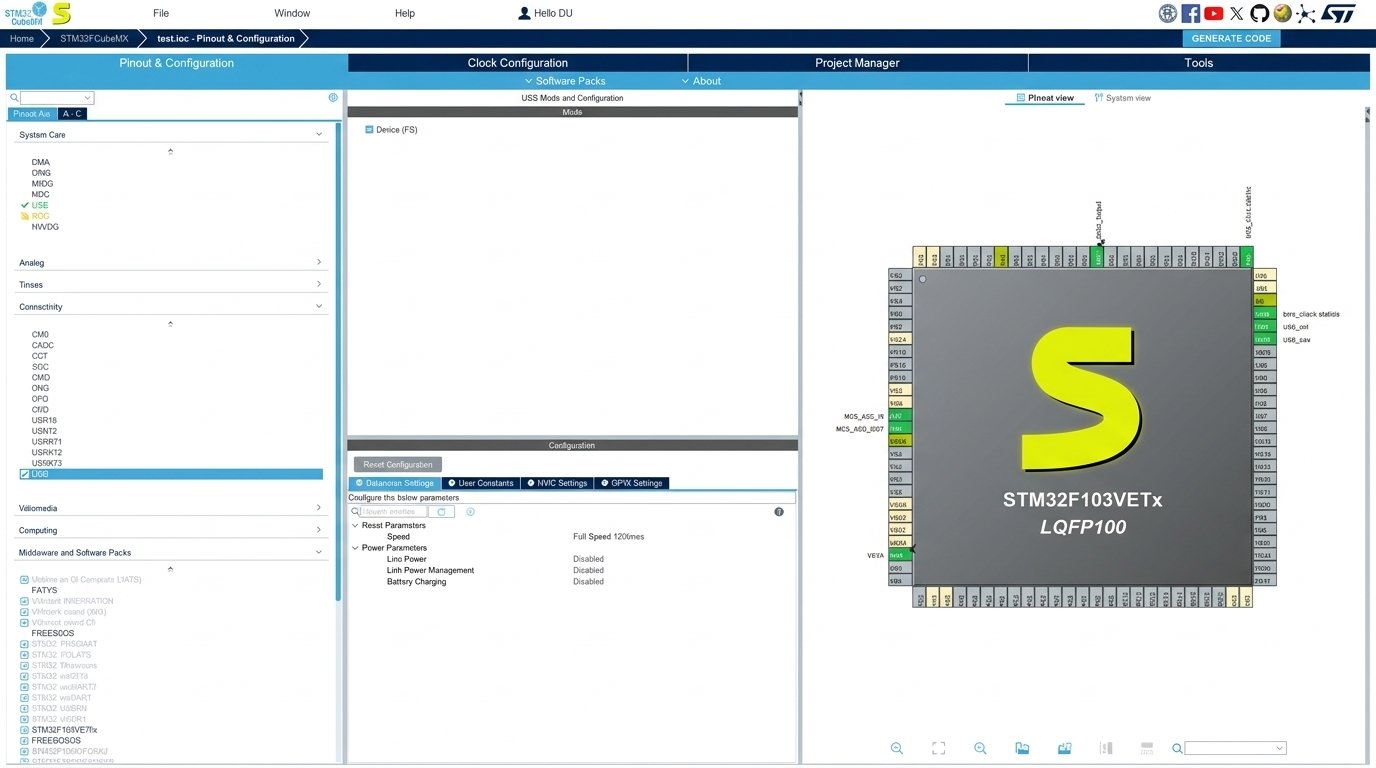
How to Install STM32CubeMX
- Download the installer matching your operating system from ST’s official site
- Run the installer and accept the license terms
- Choose an installation directory
- Launch STM32CubeMX once installation completes
- Install firmware packages for the MCU families you plan to use
STM32CubeMX Installation on Windows
The Windows installer runs like any standard .exe setup wizard — accept the license, choose a folder, and finish.
STM32CubeMX Installation on Linux
On Linux, CubeMX ships as a self-extracting installer script; you’ll need to grant execute permissions before running it from a terminal.
STM32CubeMX Installation on macOS
macOS users should choose the correct package for their processor architecture (Intel vs Apple Silicon) to avoid compatibility issues.
STM32CubeMX Initial Setup
On first launch, CubeMX prompts you to download firmware packages for the STM32 families you intend to work with — this can take a few minutes depending on your connection.
Install STM32 Firmware Packages
Firmware packages (STM32CubeF4, STM32CubeH7, and so on) contain the HAL drivers, middleware, and example code for each MCU family, and are managed from the Help → Manage Embedded Software Packages menu.
STM32CubeMX Tutorial: How to Create an STM32 Project
Once installed, building your first project follows a clean, repeatable sequence.
- Create a New STM32CubeMX Project — Open CubeMX and select File → New Project.
- Select an STM32 MCU or Development Board — Search by part number or filter by board name, then confirm your selection to open the configuration workspace.
- Configure the STM32 Pinout — Assign pin functions either manually or by enabling peripherals from the left-hand tree, which auto-populates matching pins.
- Configure GPIO and Peripherals — Fine-tune each enabled peripheral’s parameters; this is also where you’d set up UART baud rates, ADC channels, or timer PWM outputs.
- Configure the STM32 Clock Tree — Switch to the Clock Configuration tab and set your target system clock frequency, letting CubeMX calculate PLL settings automatically.
- Generate the Project and C Code — Head to Project Manager, name your project, choose a toolchain, then click Generate Code.
- Open and Build the Project in an IDE — Open the generated project in STM32CubeIDE (or your chosen toolchain), write your application logic inside the USER CODE sections, and build.
If you’re managing multiple generated project folders across different boards and firmware versions, a lightweight file organization tool like File Juggler can help keep your growing collection of STM32CubeMX exports, firmware packages, and IDE projects sorted automatically.
STM32CubeMX Examples and Development Workflow
STM32CubeMX Example Projects
Each installed firmware package ships with example projects covering common peripherals, which is often the fastest way to learn a new STM32 family’s quirks.
STM32 GPIO and UART Example
A typical beginner project: blink an LED via GPIO output, then add a UART peripheral to print debug messages over serial.
STM32 Peripheral Configuration Examples
Firmware package examples usually demonstrate ADC reading, timer PWM, SPI communication with common sensors, and DMA transfers — a great reference when configuring your own project.
From CubeMX Configuration to Firmware Development
CubeMX handles the “getting started” heavy lifting so your actual development time goes toward application logic rather than boilerplate setup.
STM32 HAL-Based Development Workflow
Because generated code relies on HAL, moving between STM32 families later in a project’s life is significantly easier than if you’d written register-level code from scratch.
STM32CubeMX Documentation and User Guide
STM32CubeMX Documentation
The primary reference is UM1718, STMicroelectronics’ official STM32CubeMX user manual, covering installation, every configuration screen, and code generation options in detail.
STM32CubeMX User Guide
UM1718 is regularly revised — it’s currently on its 49th revision, reflecting how actively the tool continues to be maintained.
STM32CubeMX Reference and Configuration Resources
Beyond UM1718, ST publishes release notes for every CubeMX version, detailing new MCU support and bug fixes.
STM32 Development Documentation and Datasheets
Each MCU family also has its own HAL/LL driver user manual and reference manual, which you’ll need alongside CubeMX for deeper peripheral-level details.
STM32CubeMX System Requirements and Compatibility
Supported Operating Systems
STM32CubeMX runs on Windows, Linux, and macOS, with dedicated installers for each.
Windows, Linux, and macOS Compatibility
macOS support includes both Intel and Apple Silicon builds, while Linux ships as a portable installer script suitable for most modern distributions.
STM32 Firmware Package Requirements
Each MCU family requires its own downloadable firmware package before you can generate code for it — these are managed from within CubeMX itself.
STM32 MCU and Board Compatibility
Because CubeMX’s MCU database is updated with nearly every release, checking for updates ensures newly released STM32 parts and boards show up in your selection list.
STM32CubeMX Not Working and Common Errors
STM32CubeMX Not Working or Not Opening: Most launch failures trace back to an incomplete Java runtime bundled with the installer or insufficient permissions — reinstalling with administrator/sudo rights usually resolves it.
STM32CubeMX Installation Errors: Installation errors are commonly caused by antivirus software blocking the installer, or attempting to install without sufficient disk space for firmware packages.
STM32CubeMX Project Errors: Project-level errors often stem from a mismatch between the installed firmware package version and the one the project was originally created with.
STM32CubeMX Code Generation Failed: Failed generation is frequently tied to invalid pin/peripheral conflicts left unresolved, or an incomplete firmware package installation.
STM32CubeMX Not Generating Code: If Generate Code does nothing, check that a valid project output path is set and that you have write permissions to that folder.
STM32CubeMX Clock and Pin Configuration Errors
Red warning highlights in the Clock Configuration tab mean your requested frequency isn’t achievable — adjust the PLL multiplier/divider values until the warning clears.
STM32CubeMX Peripheral Configuration Problems
Conflicting peripheral settings (two peripherals wanting the same pin, for example) are flagged directly in the pinout view before you’re allowed to generate code.
STM32CubeMX Missing Firmware Package
This error means the required firmware package for your selected MCU isn’t installed — fix it from Help → Manage Embedded Software Packages.
STM32CubeMX Cannot Find or Detect an STM32 MCU
If board auto-detection fails, ensure ST-LINK drivers are installed and the board is properly connected before retrying detection.
STM32CubeMX Update Errors
Update failures are usually connectivity-related; if the built-in updater fails repeatedly, downloading the latest installer manually from ST’s site is a reliable fallback.
STM32CubeMX Review: Features, Workflow, and Usability
STM32 Configuration and Code Generation Experience
For anyone starting a new STM32 project, CubeMX genuinely saves hours. The visual pinout and clock tree views turn what used to require deep datasheet-reading into a guided process.
Peripheral, Pin, and Clock Configuration Workflow
The tool’s real strength is catching conflicts before they become debugging headaches — pin overlaps, invalid clock speeds, and incompatible peripheral modes are all flagged upfront.
Integration With STM32CubeIDE and Other Development Tools
Since STM32CubeIDE 2.0.0 decoupled from CubeMX, the workflow feels cleaner: update each tool independently, and generated Makefile/CMake projects mean you’re not locked into ST’s IDE at all.
Advantages and Limitations to Consider
Advantages
- Completely free
- Massive time savings on boilerplate setup
- Visual conflict detection for pins and clocks
- Regeneration preserves your custom code
Limitations
- Generated HAL code carries some performance overhead versus hand-written register code
- Large firmware packages can consume significant disk space
- A learning curve exists for complex multi-peripheral configurations
STM32CubeMX Alternatives and Related STM32 Development Tools
STM32CubeMX Alternatives for Microcontroller Development
Developers occasionally look at alternatives, especially when working outside ST’s official toolchain preferences.
STM32 Configuration and Project Generation Alternatives
- PlatformIO — cross-vendor build system with STM32 support, often paired with CubeMX-generated code
- Manual register-level programming — full control, no abstraction overhead, but significantly more development time
- Vendor HAL libraries used directly — for developers who prefer hand-writing initialization without the graphical tool
STM32 IDE and Development Software Alternatives
Beyond STM32CubeIDE, developers commonly use Keil MDK, IAR Embedded Workbench, or VS Code with Cortex-Debug, all of which can consume CubeMX-generated projects.
STM32 Programming and Firmware Tools
For flashing, alternatives to STM32CubeProgrammer include OpenOCD-based workflows, though STM32CubeProgrammer remains the official, most fully-featured option for ST’s own hardware.
STM32CubeMX vs Other STM32 Development Workflows
Ultimately, most alternatives complement rather than replace CubeMX — it remains the fastest path from “blank chip” to “working initialization code,” even for teams using non-ST IDEs downstream.
Frequently Asked Questions About STM32CubeMX
It’s a graphical tool that lets you configure STM32 microcontroller pins, clocks, and peripherals, then generates ready-to-use initialization C code automatically.
Yes, it’s completely free to download and use for both hobby and commercial embedded projects.
CubeMX configures hardware and generates code; STM32CubeIDE is the full IDE where you write, compile, and debug that code. Since version 2.0.0, they’re fully separate downloads.
No, it’s a configuration and code-generation tool, not an environment for writing or debugging application code.
It’s used to flash compiled firmware binaries onto physical STM32 devices and manage device memory and option bytes.
Yes, it generates complete initialization C code, including HAL driver setup, based on your visual configuration.
Yes, STM32CubeMX has dedicated installers for all three major operating systems, including Apple Silicon Macs.
Final Verdict: Is STM32CubeMX Right for STM32 Development?
Verdict
If you’re building anything on an STM32 microcontroller, STM32CubeMX isn’t just helpful — it’s practically the industry-standard starting point. It removes the tedious, error-prone parts of embedded setup and gets you to actual application development faster.
Whether you’re flashing your first Nucleo board or configuring a complex multi-peripheral industrial design, the combination of visual configuration, automatic conflict detection, and clean HAL-based code generation makes it worth the small learning curve. Pair it with STM32CubeIDE or your preferred toolchain, and you’ve got a genuinely solid, free STM32 development pipeline. For deeper technical details on any peripheral, ST’s own STM32CubeMX product page remains the authoritative reference.